Wednesday, April 27, 2011

The Making of tMoTW ch 01

Verric speaking here!

Today I'm going to talk about the arduous process we use in making our manga. We probably spend too much time on each chapter. We get about 2-3 months per chapter, but we also have busy lives outside of creating The Misadventures of Tripp Weston. I like to think we're beginning to streamline this process!

Firstly, Evi will write the script. That's a hard job and I don't envy her. This gets sent to me and printed out - about 10-15 pages of written dialogue and descriptions. We go over it and make changes and begin discussing what we want it to look like. Evi will often do many copies, but I tend to only print out the final and write in any changes needed. My copy begins to look really dog eared and scribbly!

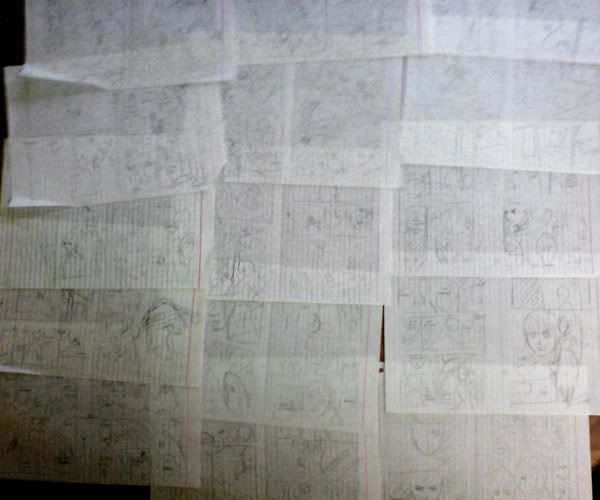
After this, I will begin what I call "storyboarding". It's not storyboarding in the true sense of the word, because that word is used in animation. Others would call them thumbail sketches, layout roughs, or the dummy. I begin to seperate the script into pages and quickly drawing out the layout and characters. Because Kiseki is published in asian format (reading right to left), it gives precedence to the left hand page. So I try pace it so that really important action falls on the left hand page. It's not always possible. I always have to keep in mind where the spine falls - you don't want to have something important like a character's face or a speech bubble too close to the spine.

Here are the stroyboards for chapter one:

and a closeup:
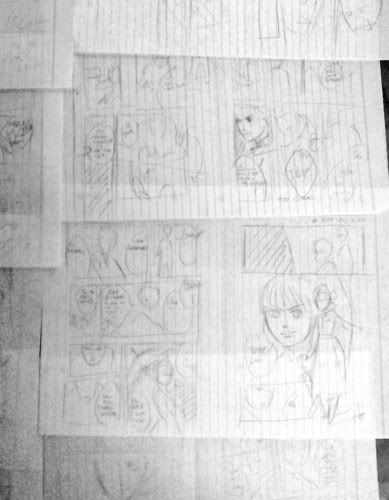

As you can see it's drawn very quickly! I just work on lined paper folded in half, so I can fit 2 pages to a sheet. This helps remind me where the spine goes when I'm drawing. Sometimes if I want to spend less time on the storyboards, I will fit 4 pages to a sheet.

This gets shown to Evi and we go through it. We've discovered because I letter the dialogue so roughly, this impedes her understanding the roughs, so these days I scan the roughs and digitally put in the dialogue. But we hadn't discovered this for chapter one. Anyway, once I get her approval, I redraw them as pencils on the correct paper - I'm using I-C Inc. manga paper because I'm too lazy to rule the page lines myself. Because I tend to make changes again here in the pencils, I run it by Evi again. Once all changes are made, I begin the inks.


Photobucket

Here are all the inked pages. Pages 1, 2, 3 were intended for colour so were not "blacked". I don't use screentone, but instead lots of flat black and some hatching. I had a lot of trouble making them presentable for publishing by Kiseki. Because they were drawn traditionally, when zoomed in the lines appeared very rough. So thats why you can tell it's quite smoothed when you view them in the magazine. By now, if changes are needed I say "tough luck!" ^^" By the time I've reached digital editing the inks, I'm always too close to the deadline.

There you have it, the story of a very lazy artist!

Saturday, March 19, 2011

White Ink vs. Liquid Paper

Verric speaking here!

I had to bring liquid paper to uni the other week. It was then I realised that I hadn't used liquid paper in a while!

I stopped using liquid paper some time ago because I was very unhappy with the results. It dried too fast, was often too thick or would thicken as you worked with it, and would sometimes scan or photocopy with a shadow of the liquid paper against the background. Having to go and remove it digitally was a waste of my time. It is designed to delete text in a document and it does that perfectly.

I then switched to white pigment ink in my artwork. I didn't get the cons of liquid paper, but instead the solution is thinner and it can take a few applications to get it white enough. As it dries, I can't work on that piece and must set it aside, so I often leave that to the end and do all the pages in one go, leaving them drying on every nearby flat surface. I can use a brush with it, which can allow for some very precice application. Apparently I can use it in a pen or airbrush as well, but I haven't tried that out yet!

I used white ink in my newest work on dA in highlighting the tree and in the snowflakes. And of course, I also used it in correcting mistakes!

However, I've discovered a new use for liquid paper. When almost dry, I can brush it over black areas to give a light texture. However, I would prefer a brush and acrylic - it's easier to predict the outcome and doesn't dry so fast! :D

Sunday, March 6, 2011

Brush + wash

Verric speaking here!


I tried inking with a brush for a quick effect with an ink wash overlay. I actually did it in two layers because I needed different paper for different sections. With the inking I needed smooth paper, but watercolour paper for the wash, which were then merged together on the computer. I wanted it to look like a traveler was passing through and had made this quick sketch to record memories of this place, so I tried to work as fast as possible. I added texture by using the watercolour paper and by splattering ink around. I had a lot of issues because this was the first time trying out brush inking, and I hope to get more opportunities for practice in the future.

You will see this image in Chapter 2, hopefully coming out soon!

Saturday, February 26, 2011

Sketch

Verric speaking here


We were asked recently by Jono to include 5 extra pages in chapter 2, so I've been working hard on these as well as my chapter 2 final edits. I've planned to have 3 pages of illustrations out of the 5, so I'm hoping they turn out exactly as I have planned :D The sketch above will be our intro page in which I try something new with inking! I will post up the results

Wednesday, February 16, 2011

Sunday, January 30, 2011

Reading


Verric speaking here!

One thing I love is a good book. And as someone terribly interested in drawing, I love a good book on drawing! I picked up this one from my local library recently:


The author is absolutely crazy about inks!


There are so many types of inks and different ways of applying them. For example, there was a bit where they talk about chinese stick inks - they cost a bomb, one stick lasts forever, improve over time like wine and can be passed down from generation to generation!


Sorry for the horrible mobile phone pics. I don't have access to a scanner while my younger sisters are home for school holidays. But those are just an example of some of the pictures in the book. The one with the horseman was an example of creative freehand work, and the rhino's textured skin is made out of crawling people - it reminded me of Heironymous Bosch.

I'm really intimidated! ;_; There's so much to learn! I want to improve my inking so much since that's one of the huge areas in which I am lacking. And I really need to invest in proper inking pens and materials. Maybe later I'll make a post about the inferior materials I currently use! ^^"

Saturday, January 8, 2011

What Verric has been up to...


Verric speaking here!


That's the inside of my house... Okay, you got me there! It isn't.

I recently visited the Art Gallery of NSW to see "The First Emperor: China's Entombed Warriors" exhibition. (See here for info!) It is amazing to see the terracotta warriors. They brought one of each type, as well as various artefacts from that time period including items from the first emperor's tomb. A long time ago, my ancestors came from China, and my parents still identify as Chinese, so to me it was fascinating to be able to see a piece of history here in Sydney. They had a slideshow playing showing some of the faces and hairstyles seen in some of the warriors... they need to bring back braided hair and topknots for men!

To me, the negatives are that you have to pay to go in, it seems to be pretty popular (and hence crowded) and it's all dark and atmospheric. I prefer bright lighting! (Also, no photography allowed!)

We also looked around the rest of the gallery - my parents loved the asian artefacts section.

Photobucket

That's part of my art supply cupboard next to my desk - can you spot my chinese warrior paper doll and his "clothes horse"?